This post will show you how to build an SQL view and link it to an Acumatica data access class (DAC) so it is available to the Acumatica reporting tools.
As an example scenario, we will generate a view from our accounts payable payments table that could be used to generate a positive pay file for our bank. (This is an example of creating SQL views and is not intended as a guide to create a Positive Pay file.)
Demo Built in Acumatica Environment: 5.20.0531
Data: SalesDemo data from Acumatica’s Partner Portal

Business Purpose
SQL views are read-only database tables created from other tables in a database. Views can be brought into Acumatica as a data access class (DAC) and utilized by Acumatica reporting tools. A SQL view could be used to:
- Include externally maintained data in Acumatica reports
- Create data views that are maintained outside of Acumatica
- Renaming database field headlines
SQL views are an optional approach for bringing data into Acumatica. The preferred method of maintaining data in Acumatica is to have all data flow through the Acumatica business logic. Managing data with the Acumatica business logic provides field header name flexibility, ensures a high level of data integrity, centralized data security, and enables automatic integration with reporting tools.
Technical Process Overview
In this article, we describe how to:
- Create a simple SQL view using data an Acumatica database
- Link the view to our Acumatica application using Acumatica customization tools
- Generate reports using the SQL view we created

Acumatica Implementation
In this section we describe how to quickly demonstrate this capability in Acumatica. We will do this in three steps:
- Create a View in our SQL database
- Link the database view to an object in Acumatica
- Build reports using the data
Step 1: Create a View
Creating a SQL view does not depend on Acumatica. This is accomplished using standard Microsoft SQL tools. For this exercise, we will use the SQL statement below to select data that would be useful for creating a PositivePay file.

When creating a view it is usually a good idea to include the CompanyID field since it appears in all tables in the application. In this case we did not include it because it was not needed for the Positive Pay export file.
The view above includes three tables:
- APPayment: includes all the payments that we send to our financial institutions. We only want to include check payments from a single company that are not cleared – so we limit the results using the WHERE condition.
- APRegister: includes all payments that are prepared for payment. Information regarding the check amount and the transaction date is contained in this table.
- CashAccount: includes the reference number that is needed for the file we prepare for our bank
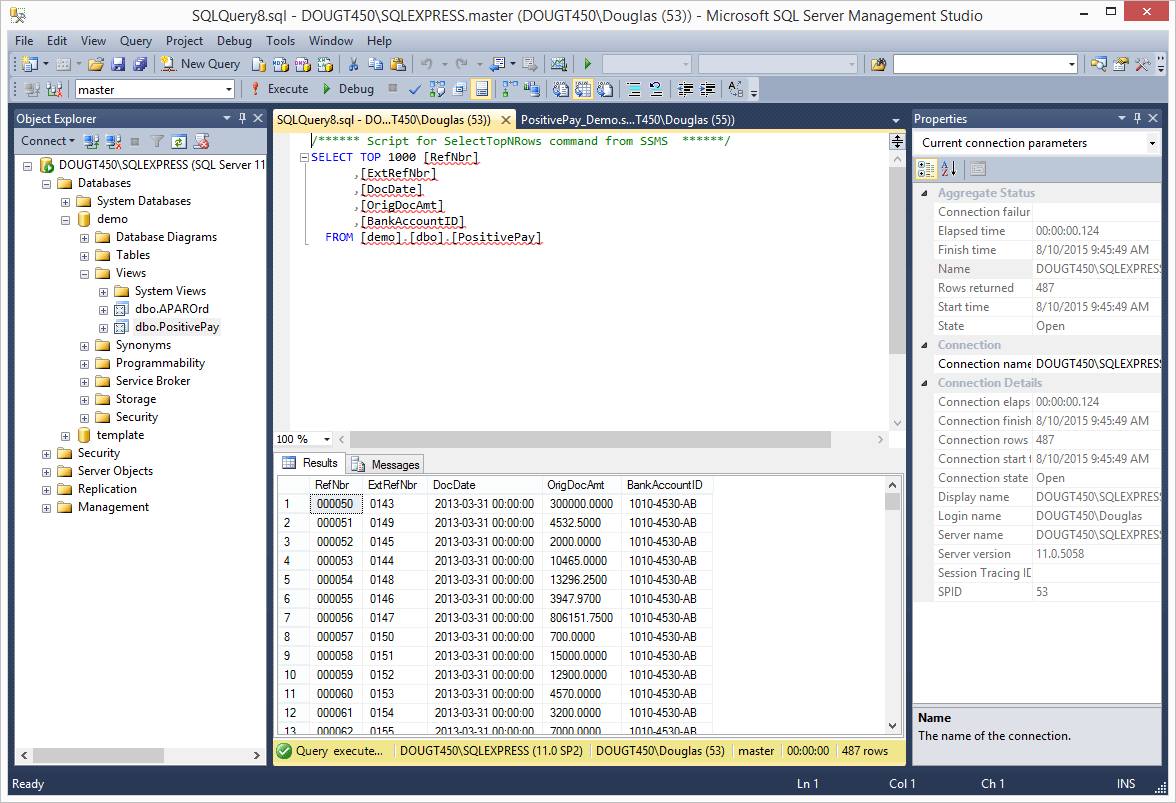
Running this with the RevisionTwo demo data from August 2015, creates the view below. There are 487 transactions because most payments in the demo data are not reconciled and marked as cleared.
Step 2: Link View to Acumatica
The Acumatica development tools make it easy to expose the SQL view we just created to our reporting tools.
We do this by writing some code to create a data access class in Acumatica that can be referenced by our Business Query Language (BQL). This may sound complex, but using the Acumatica customization tools it can be completed just in a couple of minutes. The process is outlined below.
Create Customization Project
If you are using an account with the customizer role, then:
- Click the customization button in the upper right corner and click the first option to Select Project…
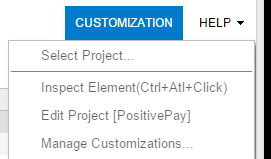
- Create a new project and then select that as your working project:
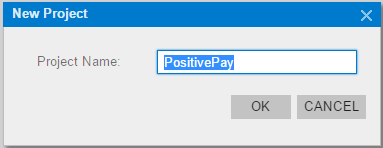
- Return to the customization menu and select the option to Edit Project from the drop down menu4. In the new customization project, create a new code file using the template IBqlTable as illustrated below:
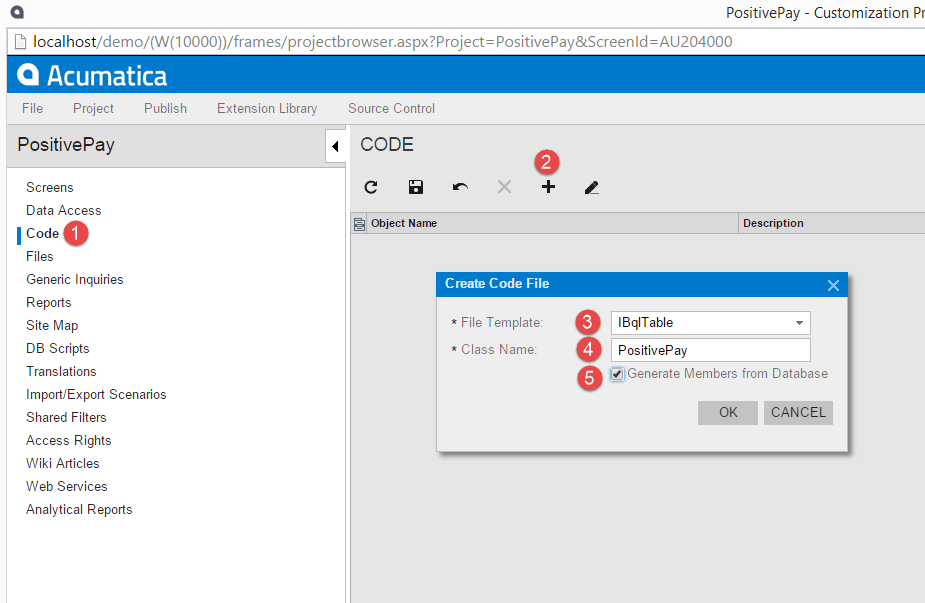
- Select the code area of the customization menu
- Click ‘+’ to add a new object
- Select IBqlTable as the File Template
- Enter the name of your View that you created in the prior step. The class name must match the name of the view you created.
- Check the box to generate members from database. This option will cause Acumatica to automatically create a code file based on the elements in the table that you created.
- The result is the code that you see below:
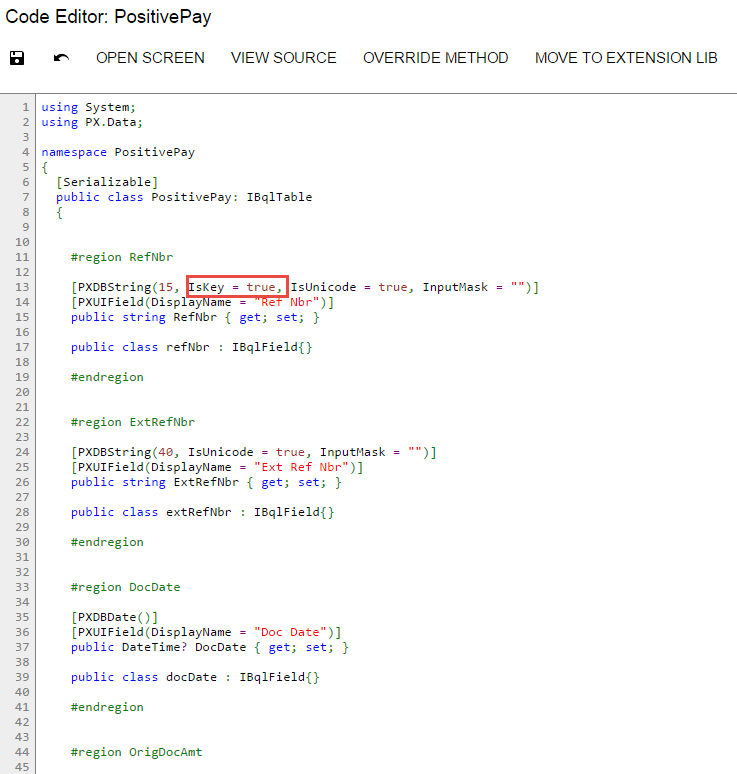
Note: The only addition I made to the automatically generated code was a key field indicator. A unique key within my new object called PositivePay is important for the system reporting tools. This information would have automatically been populated by the system had my database view had a primary key defined.
Compile and Publish Your Customization
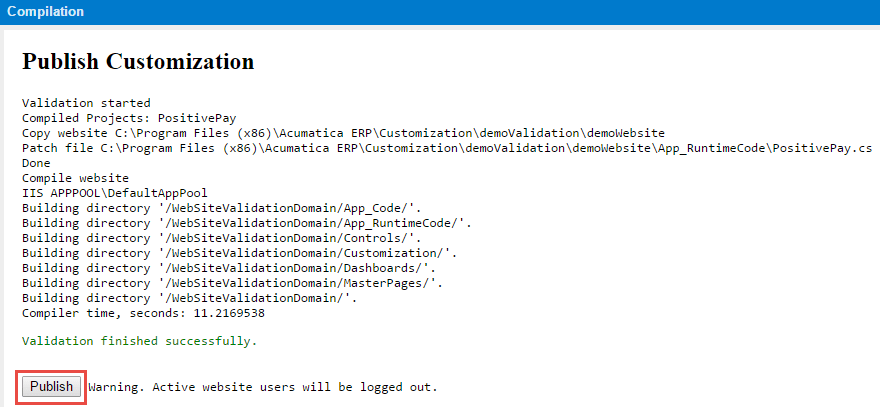
After completing your customization, simply compile and publish your project like you would with any other Acumatica project. The steps are provided below.
- Navigate to System > Customization > Manage > Customization Projects
- Check the box in front of your customization
- Click the Publish button
The system automatically validates your solution. Press the publish button to make your new table available to your system.
Step 3: Create Reports
With the new data table incorporated into Acumatica, you can begin using the data with your Acumatica reporting tools.
Example 1: Generic Inquiry Writer
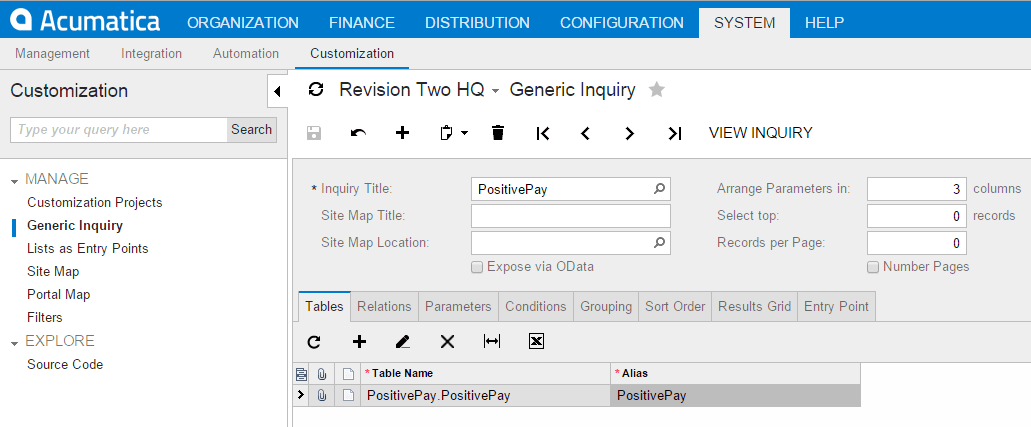
Creating a new generic inquiry is easy. Navigate to the generic inquiry designer, enter a simple title, select the new table that you created, and add fields to your results grid.
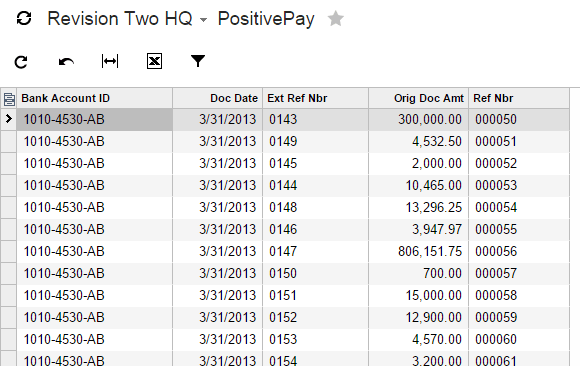
The results above are based on the SalesDemo data from the RevisionTwo company. I entered the Bank Account ID in the cash account associated with my standard checking account. This file can be exported to your bank to prevent fraudulent checks from clearing.
Example 2: Report Designer
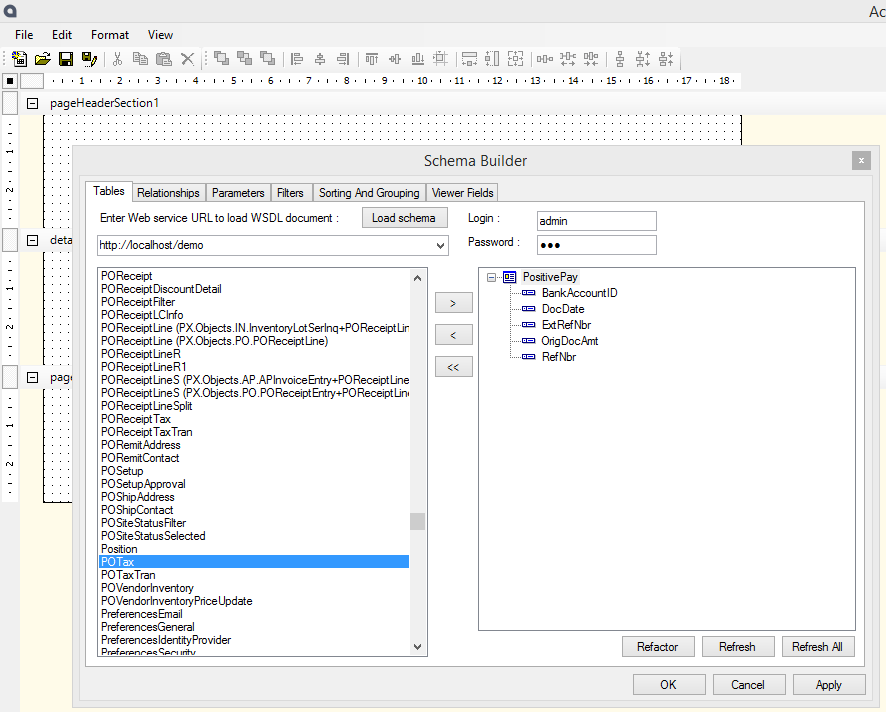
The Report Designer uses the same data access classes that are available to the Generic Inquiry. To show this:
- Open the Report Designer
- Select the Build Schema Button
- Enter your URL, login, password and click Load Schema
- Select your Object.
Conclusion
The process of importing SQL views into Acumatica is quite easy. After some practice, you can create views and create the data access class in Acumatica in about 5-10 minutes.
In this example, I demonstrated adding a SQL view, but a similar process can be used to create data access classes (DACs) for other database tables. This makes it easy to incorporate external data into Acumatica reports. For example, I created a simple database table called SOGoals in my Acumatica database, added a DAC following the same process defined in this article, and then used those goals in my reports.


