Introduction
When integrating into Acumatica using the REST API, it is very helpful to use the Acumatica.RESTClient.dll. The Acumatica development team has provided this tool in Github at the following URL: Acumatica/AcumaticaRESTAPIClientForCSharp (github.com)
Part of this repository is the full code for a tool that creates all of the models for a given endpoint that can be used in conjunction with the RESTClient. This tool is called EndpointModelGenerator.
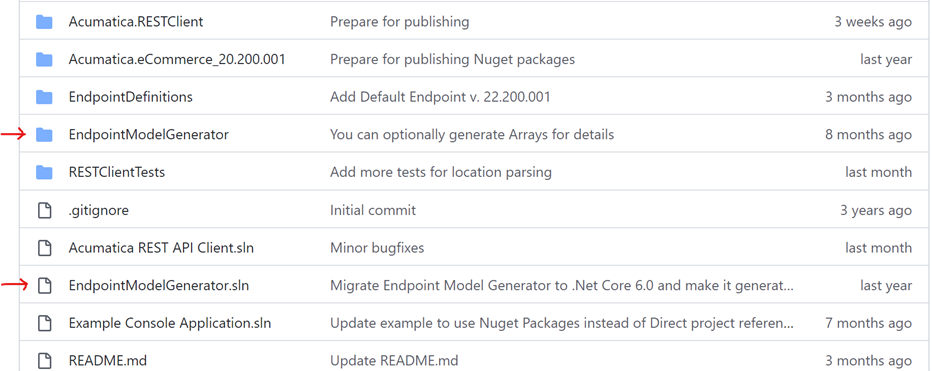
Download the latest version of this full repository, since the code changes will be made to both the Acumatica.REST.API.Client.sln and also the EndpointModelGenerator.sln.
In my previous blog post, Integration Using the REST API Client with Acumatica’s Manufacturing Module, I describe how to use the existing models for the DEFAULT and MANUFACTURING endpoints. But what if you need to customize these endpoints, or create a new endpoint?
The EndpointModelGenerator code provided in Github is a C# desktop app that uses the JSON output from the Open API definition of a Web Services Endpoint and creates the associated C# classes that can be used with the RESTClient.dll. Let’s walk through the steps on how this works.
You must open the solution in Visual Studio 2022, as it requires .Net 6. Build and run the project as is, and you will be asked to do 3 steps:
- Enter the path to a Visual Studio Project that will hold the models.
- Paste in the JSON for the endpoint
- Click on a button to Generate the C# files for the models.
This is pretty straightforward – but there is some prep work to be done.
Prerequisites
To start with, I have extended the DEFAULT endpoint to a new one called DEVMVPBlog, version 20.200.001. See below for the screenshot of this endpoint. There is a new entity in this endpoint for Inventory Issues, which is missing from the DEFAULT endpoint. Any of your custom endpoints starting with version 20 or higher will work in the same way.
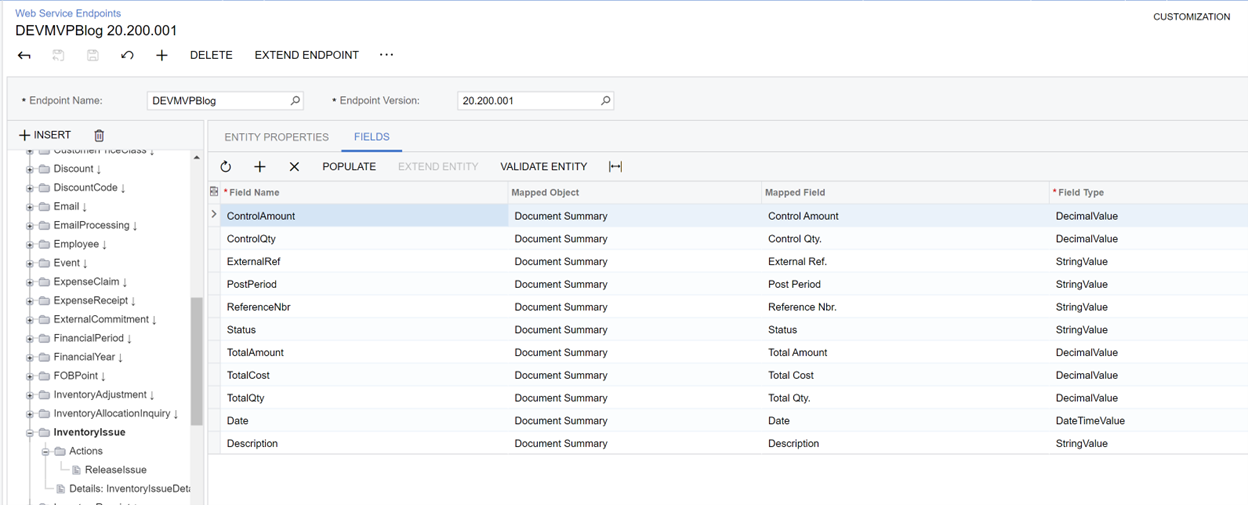
Next, create a new project inside Acumatica.REST.Client solution. For this example, the project is added to the Endpoints folder. It is a C# Class Library, and I’ve named it Acumatica.DEVMVPBlog_20.200.001 to keep the same naming convention as is used by the existing endpoint projects. The project is created with a single, empty class file as shown:
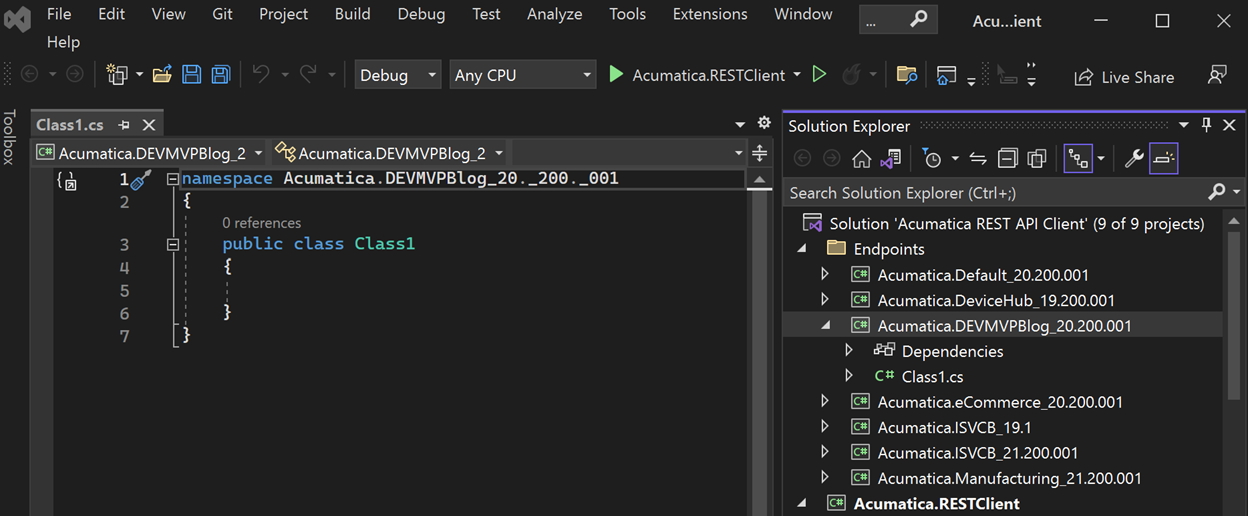
Delete the Class1.cs as it will not be used, and then save your changes to the solution.
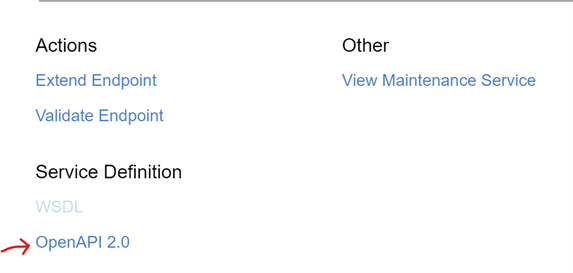
Next, you must go back to the custom endpoint, click on the ellipses (…), and choose OpenAPI 2.0. A new tab will be displayed showing the JSON representation of the endpoint definition. (see below examples)
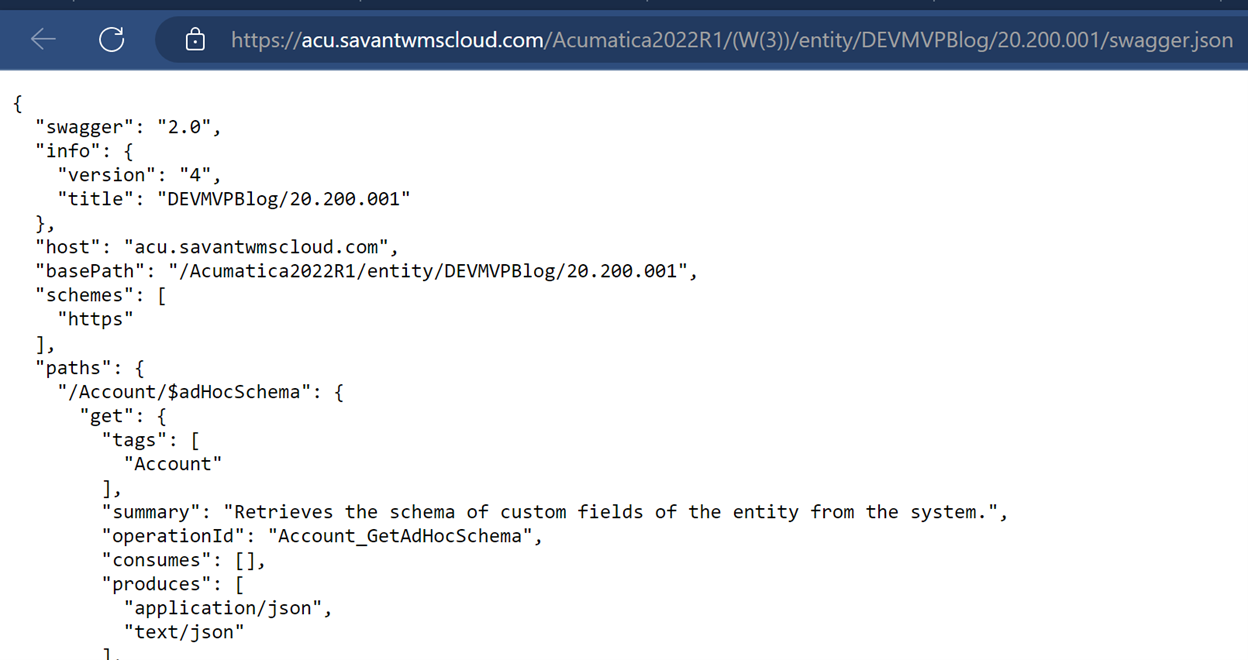
The JSON data for my extended endpoint is VERY long – over 95000 lines. It is too large to paste into the text box on the EndpointModelGenerator, so I chose to make a modification to the way the EndpointModelGenerator works in the baseline code. So, for this step, I saved the JSON text from the web page to a text file with the extension of .json.
I then modified the EndpointModelGenerator code to ask the user to browse for the .json endpoint schema file instead of pasting it directly to the text field. Then, I changed the Generate button to open up the file and to use it in the generator process itself.
The form now looks like this, with Steps (1), (2), and (3) all being defined as buttons.
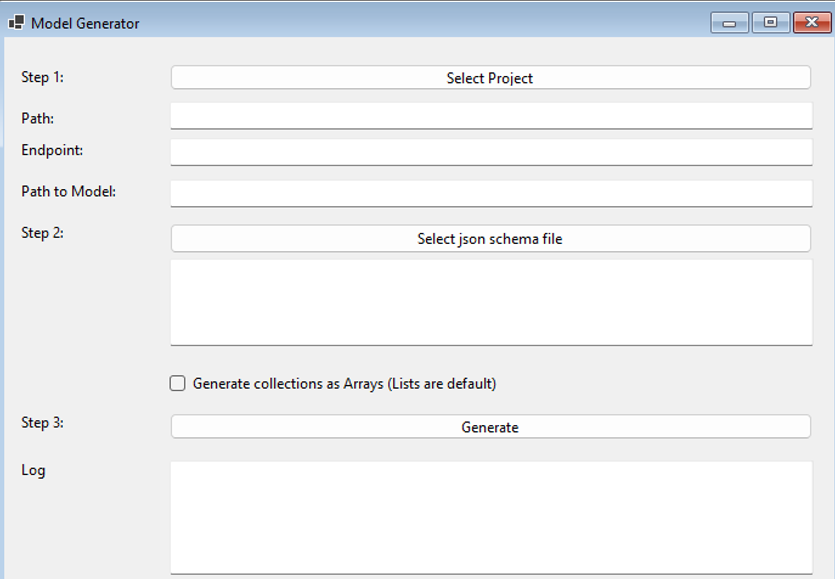
The code changes to the Generate process are shown here:
GIST: https://gist.github.com/dianecawley/2018d5f1cc4146966848056bd6b45f6f
Run the Model Generator
Now that everything is prepared, it’s time to run the Generator and see the results.
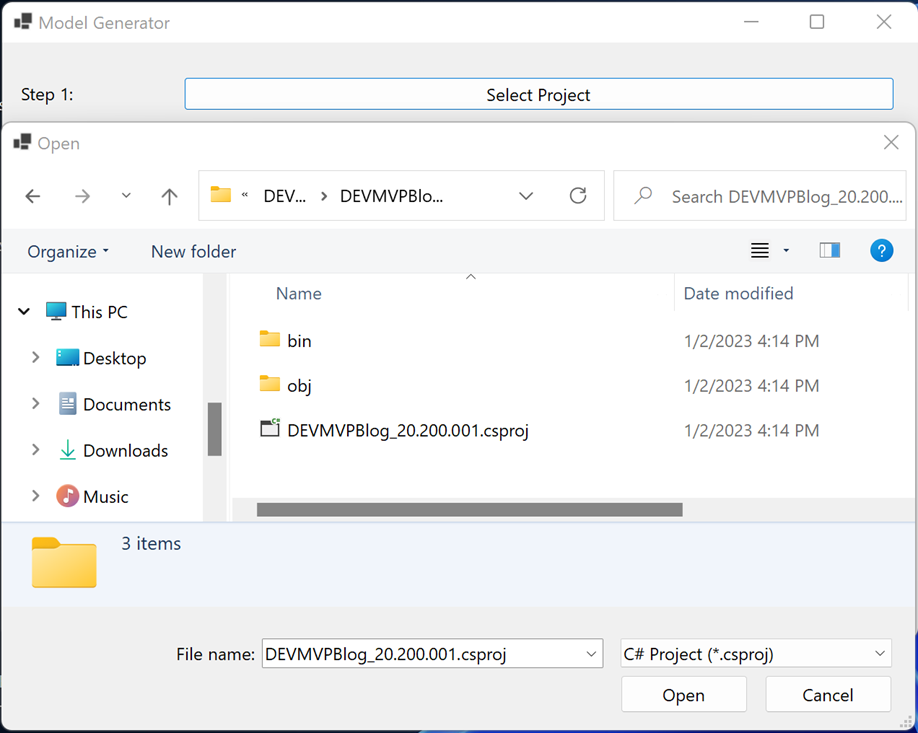
Step (1) – Click on Select Project. Browse to the .csproj file that was created for use with the new endpoint definition, and click Open.
Notice that several other text boxes are filled in with information needed to proceed with the generation of the models.
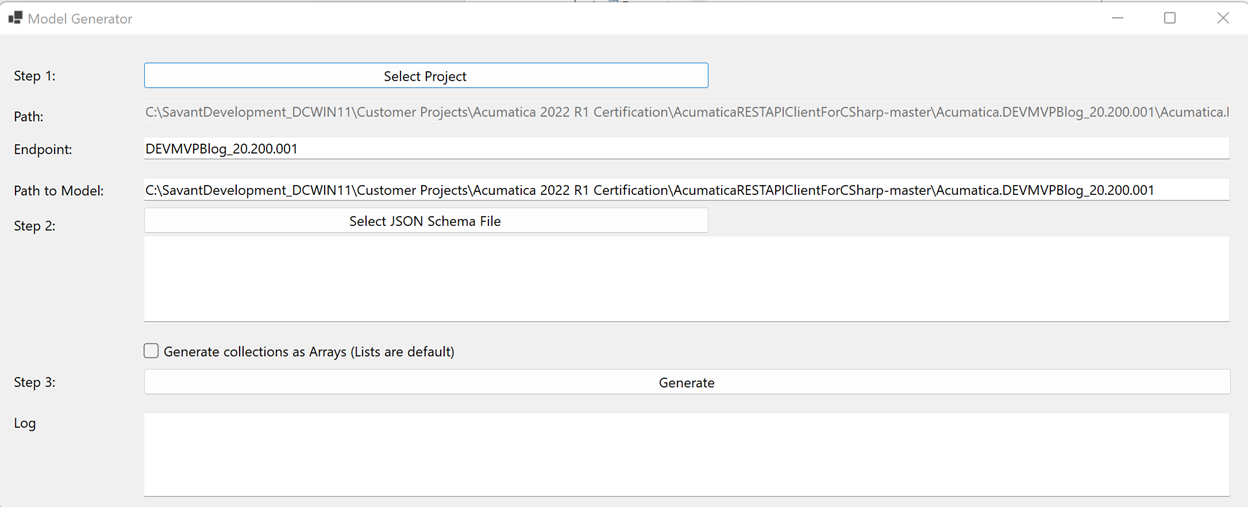
Step (2) – Click on Select JSON Schema File. Browse to the .json file that was created from Acumatica’s Open API definition, and click on Open.
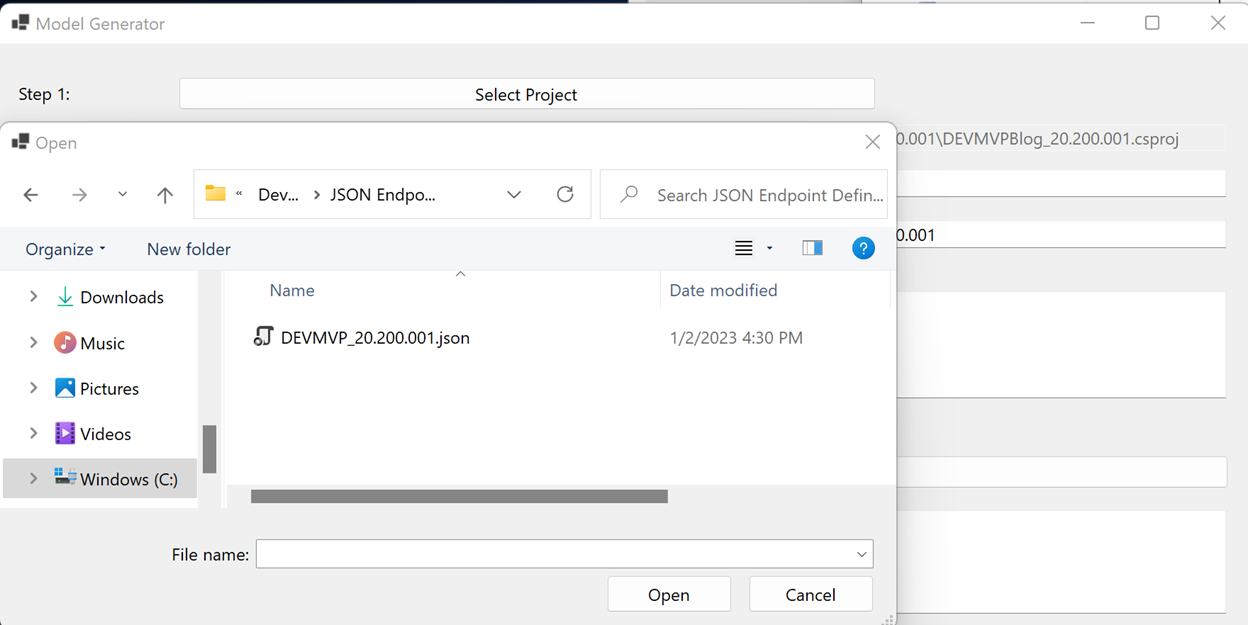
The file path is shown on the form.
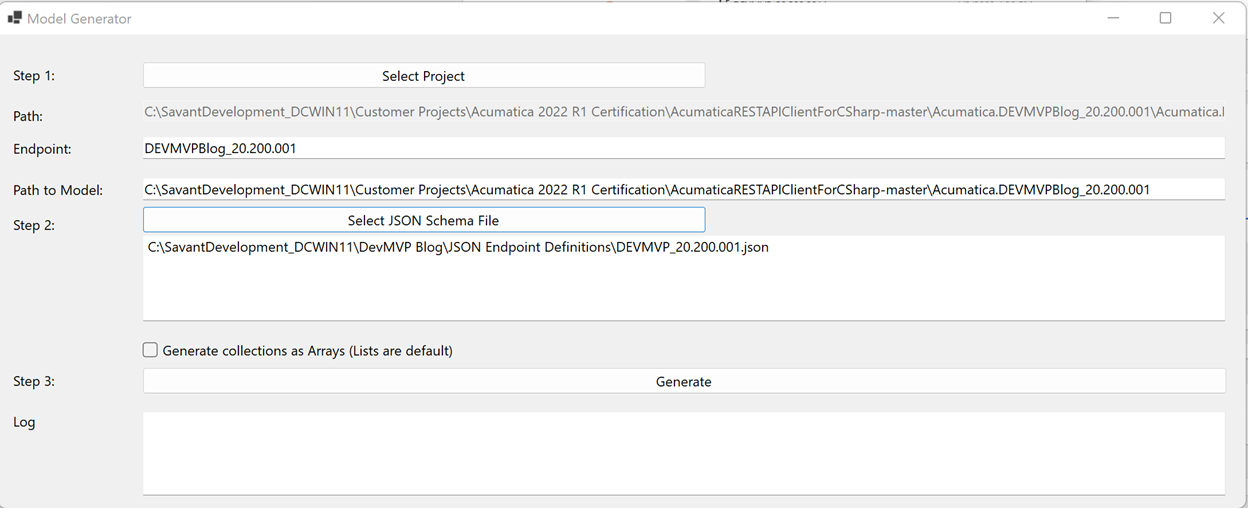
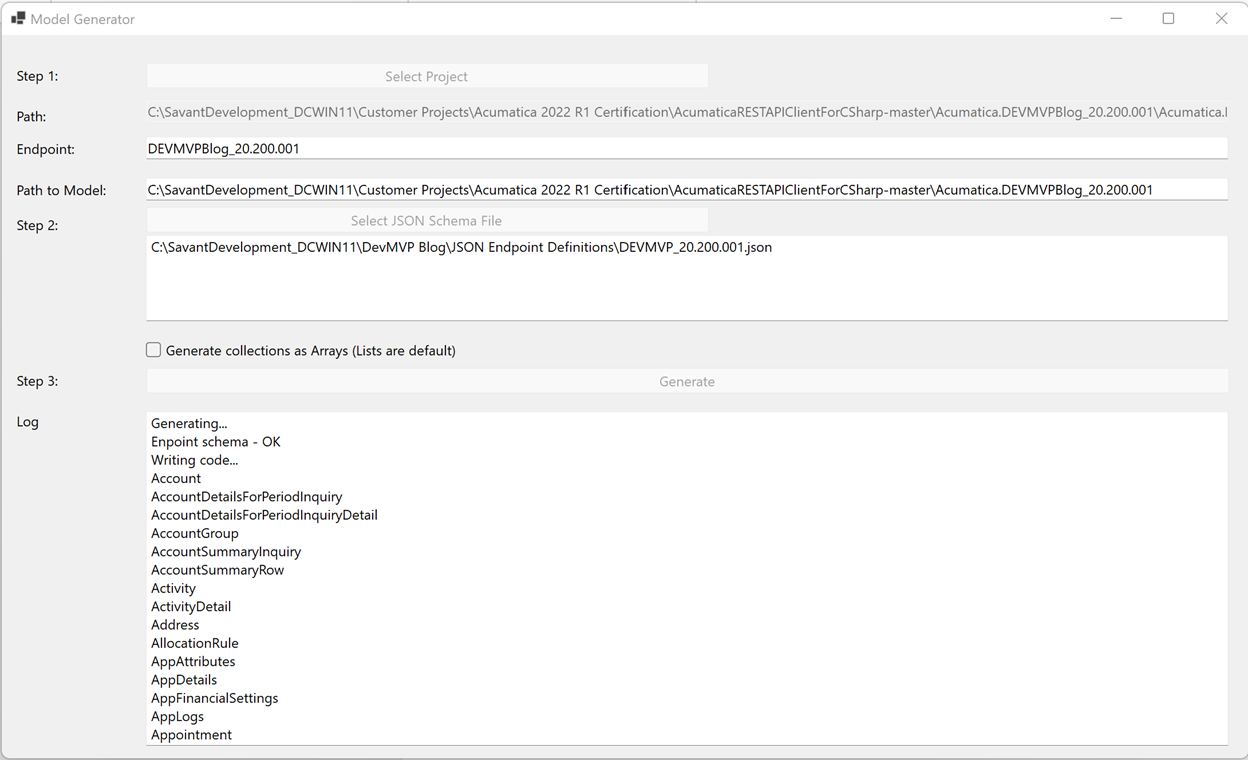
Step (3) – Click on the Generate button. This is where all of the work takes place. The log text box will be populated with each of the entities in the endpoint as they are being processed.
Check the Results in RESTAPIClient Code
Open up the Acumatica.REST.API.Client solution. Notice that the Acumatica.DEVMVPBlog_20.200.001 project now has been populated with the API and Model subfolders – and all of the entities in the endpoint now have appropriate class definitions. I’ve opened the InventoryIssue class as it was the primary reason for the new endpoint in this example.
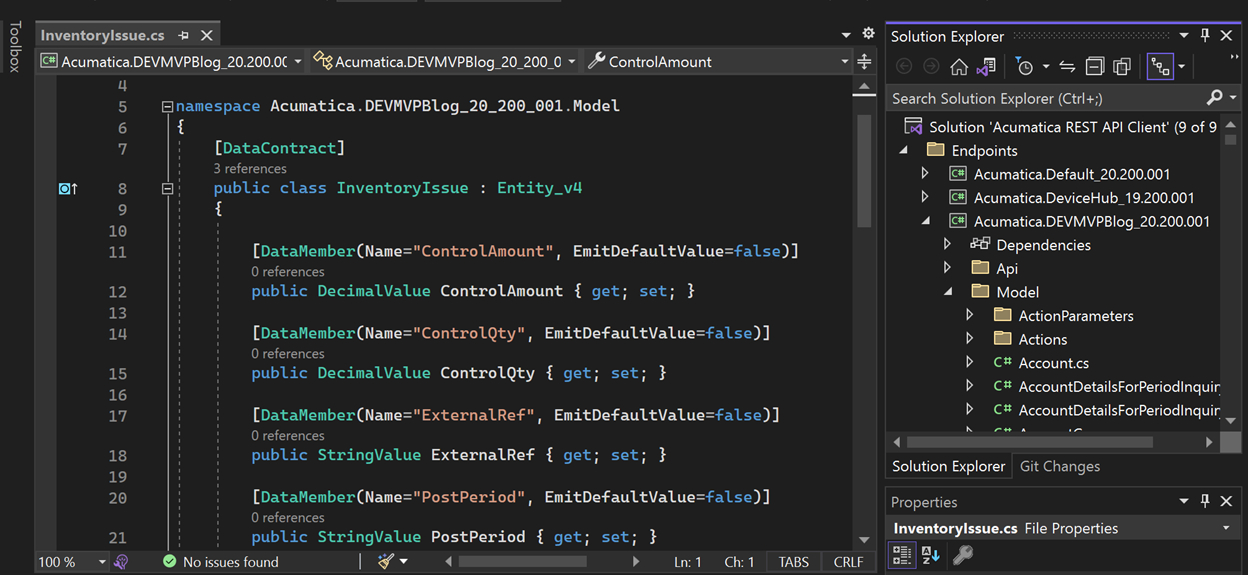
Building the solution will create the Acumatica.DEVMVPBlog_20.200.001.dll, which can then be used in your integration code project.
Use the Resulting Endpoint .dll
Open your integration solution, and add a reference to the newly created endpoint .dll (from the build in the last section).
Then, add the ‘using’ statements for both the *.Api and *.Model classes within the referenced .dll. See the below example.
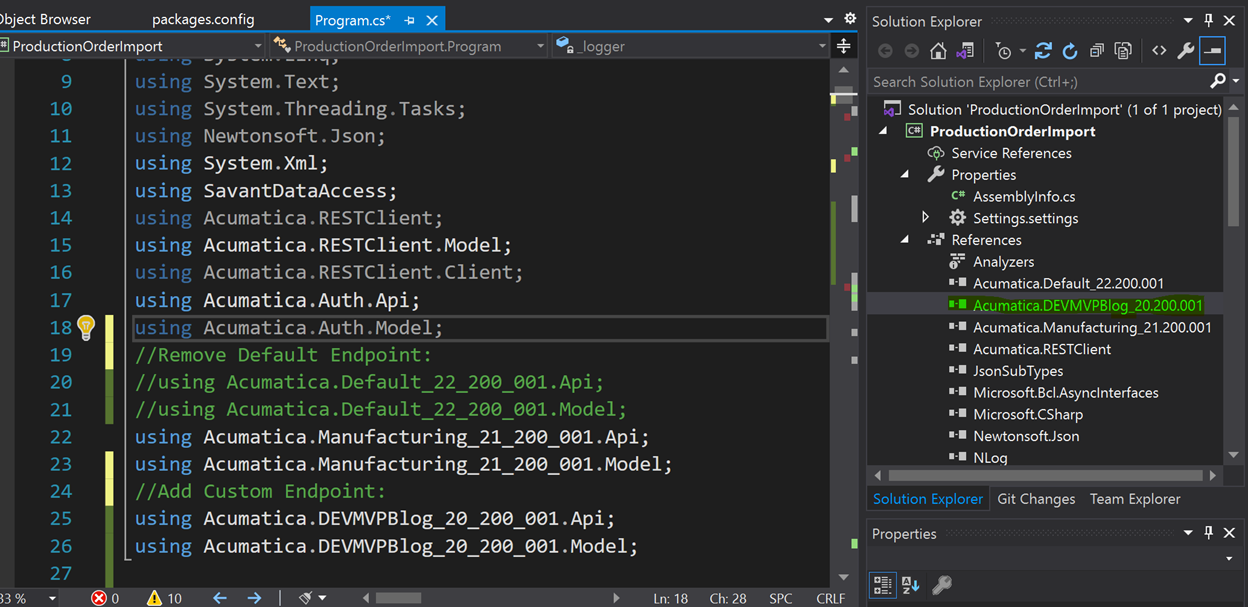
Following is a code snip using the newly available InventoryIssues object
GIST: https://gist.github.com/dianecawley/842df182253669de0a2d37c429ec1b76
Conclusion
The Endpoint Model Generator is a real timesaver when a custom endpoint has been created in Acumatica, and a third-party piece of software needs to utilize the REST API client for integration. Even though a few steps are needed in the process of creating the endpoint models, it is far fewer than writing the classes individually. Many thanks to Dmitrii Naumov for creating the REST API Client as well as the Model Generator. As an Acumatica ISV with a connected product, our team saves time by using these tools.
Happy Coding!
 Canada (English)
 Colombia
 Caribbean and Puerto Rico
 Ecuador
 India
India
 Indonesia
 Ireland
 Malaysia
 Mexico
 Panama
 Peru
Peru
 Philippines
 Singapore
 South Africa
 Sri Lanka
 Thailand
 United Kingdom
 United States


