 Canada (English)
 Colombia
 Caribbean and Puerto Rico
 Ecuador
 India
India
 Indonesia
 Ireland
 Malaysia
 Mexico
 Panama
 Peru
Peru
 Philippines
 Singapore
 South Africa
 Sri Lanka
 Thailand
 United Kingdom
 United States

Intro

Years ago, Enterprise Resource Planning (ERP) technology lived up to the stereotype of being big systems designed for large, multinational corporations: cumbersome, unwieldy, inflexible, and hard to implement.
At that time, the perception was well-earned, but now, with cloud-based business management systems designed for small and mid-sized organizations, ERP has built a new reputation of flexibility, agility, and responsiveness. Even with this evolution of ERP technology, there remain many vendors that provide, and organizations that rely on, legacy business management systems that are essentially sets of complex, bolted-together applications that force your business to adapt to their rigid structure instead of molding themselves to your processes and workflows.
Raumix and Tosas, two entities operating as part of the South African construction conglomerate Raubex, tried to implement such a legacy ERP system for three years before giving up. The system required heavy, expensive customizations. Even minor adjustments had to be made by outside consultants
When Raubex turned to Acumatica, they chose a company that believes, as one of its core tenets in the Acumatica Customer Bill of Rights, that all customers have the right to “fully adapt and customize the solution to meet your evolving business requirements.” This means that with the correct tools and approach, you can empower your business process experts—the people who know your organization best—to make customizations to the Acumatica system themselves: quickly, efficiently, and without writing a single line of code.
Fittingly, we call this “no-code customization.” Recently, we covered Generic Inquiries, which are part of this no-code customization promise. Today, we’ll take a deeper dive, covering five of Acumatica’s foundational no-code tools and how to use them.
Acumatica’s No-Code Customization Tools
Businesses of all sizes, particularly SMBs, are looking to optimize some core organizational tasks like:
- Streamlining order confirmation.
- Automating communications with customers.
- Controlling actions based on payment conditions.
- Adding quick access to reports and inquiries for better visibility.
They’ll be able to accomplish these goals (and many more beyond these basic examples) using five no-code customization tools in Acumatica: Fields, Conditions, Actions, Workflows, and Business Events. Let’s take a look at each and consider how they can be applied to a typical business growing their operations with Acumatica. Let’s call them Company X.
While these examples do build on each other, if you’d like to jump to a specific section, just use one of these links:
And for more information on each, check out Acumatica’s Educational Resources.
Creating the Customization Project
Before Company X’s business process experts can start making customizations in Acumatica, they’ll need to create a Customization Project. Multiple customizations can be grouped into the same project, but the best practice is to create separate projects for different types or logical groups of customizations. The steps are covered in detail in these resources from Acumatica MVPs Gerhard Van Den Heever and Keith Richardson: “Introduction to Acumatica Customization Packages” and “Acumatica Customization Projects Overview & Tips.” But, for a quick start:
- Open the Customization Projects
- To create a new Customization Project, click on the plus sign (+) at top of the screen, directly beneath the screen’s title.
- A new row is created. Enter a name for the project in the Project Name
- The Customization Project is now a blank canvas ready to be used for the following configurations.
- Make sure you save all changes.
1. Fields
Acumatica’s fields represent individual pieces of data stored in the system. Think of it in terms of a cell in a table. One cell—one field—contains one piece of data. These fields make up forms, which are the user interface for interacting with data in Acumatica. There are two types of fields:
- Standard Fields – These are prebuilt into Acumatica. They include things like ID fields for customer IDs and order numbers, name fields for item and vendor names, date fields for deadlines and shipment dates, and so on.
- User-Defined Fields (UDFs; also called “attributes”) – These can be created by users to store custom information relative to specific business processes.
Knowing what fields are and how to use them is essential to working in Acumatica because fields are the basic building blocks of how Acumatica stores and manages business data.
Returning to our example story, as Company X expands its customer base into new areas, it needs to differentiate between B2B and B2C customers on the Customer Form in the Acumatica system. Its business process experts can accomplish this goal by adding to the Customer Form a user-defined checkbox field for “Is B2B Customer.”
Adding a New Field to a Form
- Open the Customization Project and click on Customize Existing Screen.
- In the Select Screen dropdown, choose the Customer Form and click “OK.”

- Click on the field under which you want the new field to appear.
- Navigate to the Add Data Fields tab and click on New Field.
- In the Create New Field box, add a Field Name, which must begin with the prefix “Usr,” and a Display Name. Also specify the Storage Type and the Data Type. Company X could use:
- Field Name: UsrIsB2BCustomer
- Display Name: Is B2B Customer
- Storage Type: DBTableColumn
- Data Type: bool
- Click “OK” on the Create New Field box.

- The new field will appear in the Add Data Fields
- Check the checkbox next to the new field and click Create Controls.
- The field will now appear where you wanted it to be, under the field you selected in Step 3.
Conditions
Conditions are Boolean data types, meaning they have two possible values—true or false—and they have several important functions in Acumatica. They can be used to define criteria that control when certain fields, actions, or UI elements are visible, enabled, or updated, as well as to trigger automation steps based on specific conditions.
Company X is accustomed to fulfilling B2B orders in which delayed payment terms are negotiated—meaning payment is due after a certain period (e.g., 7 days, 30 days, 60 days, etc.) or on receipt of the order. As they expand into B2C sales, Company X must take into consideration the fact that customers often pay for their orders at the time or purchase. To streamline shipping, management decides that orders must be fully paid before shipments are created.
To accomplish this in Acumatica, Company X will create a condition that checks whether the Paid Amount field is equal to the Order Total field. If the amounts in these fields are not equal, meaning the payment has not been fully made, the system will disable the “Create Shipment” button. The condition tells Acumatica not to allow a shipment to be created.

Dynamically Enable/Disable Action Using Conditions
- Add the Sales Order Screen to the Customization Project.
- In the left-hand dropdown menu, under the screen name, click on Conditions.
- Click on the plus sign (+) to add a new condition.
- Give the new condition a name, like PaymentComplete for this example.
- Set the Field Name to Total Paid.
- Set Value 1 to Order Total.
- Set the Condition to Does Not Equal.
- Make sure that the Active checkbox is marked and click OK.
- Back in the left-hand dropdown menu, under the screen name, click on Actions.
- Click on the Create Shipment

- In the Action Properties box, set the Disabled dropdown to the name of the new condition—in this case, PaymentComplete. Click OK.
- After saving and publishing the Customization Project, the condition will go into effect on the Sales Order screen. If the values in the Total Paid and Order Total fields do not match, the Create Shipment action will be disabled.

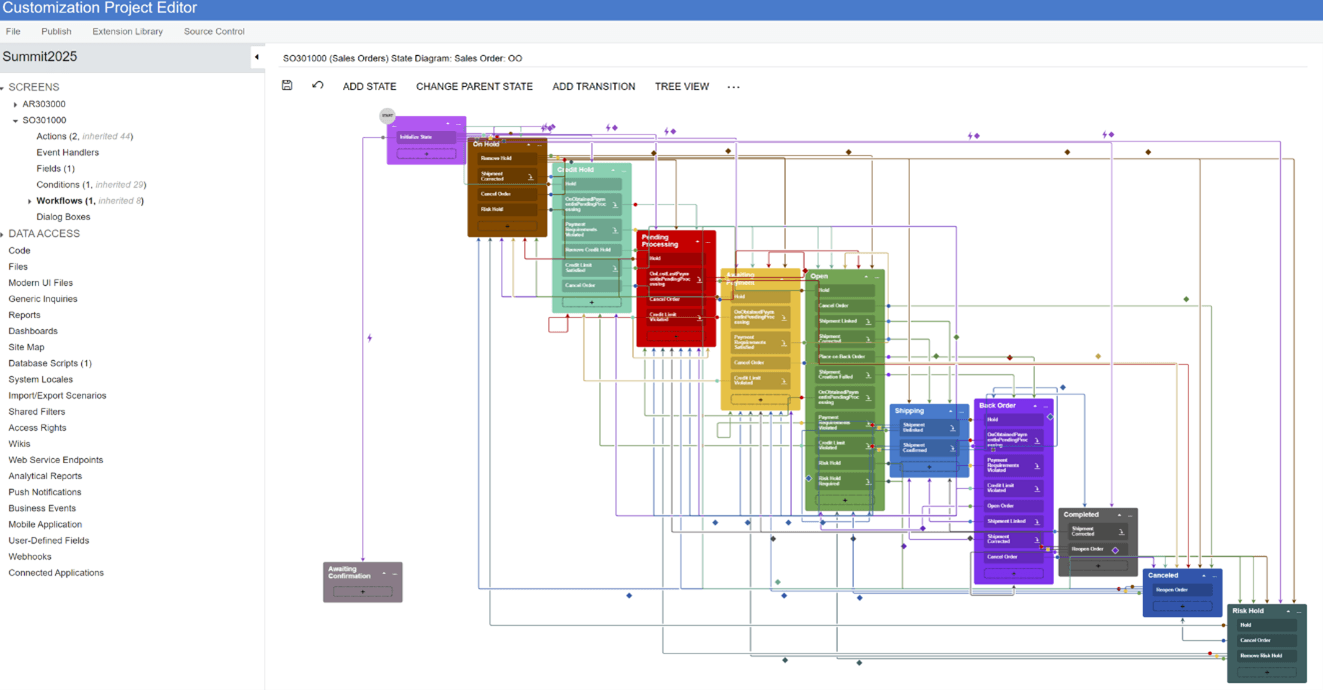
4. Workflows
Workflows are core to how Acumatica automates and streamlines your operations. They are composed of states (the state/stage of documents) and transitions between these states that are trigged by certain conditions (actions and event handlers). 
While some workflows are pre-built into Acumatica, you can modify those workflows and create new ones inside the Acumatica Workflow Engine.
B2C orders often require sales representatives to confirm order details, such as shipping preferences or product availability, before proceeding with the order. But Company X’s sales representatives find it challenging to track which orders need confirmation, leading to potential delays, miscommunication, and missed opportunities to build trust with these new customers. Company X can solve this problem by building a workflow that includes the following three steps:
- When the Acumatica system receives an order, it places that order in an “Awaiting Confirmation” state.
- Sales representatives can easily see which orders are listed as “Awaiting Confirmation.” They can then confirm necessary order details via the “Confirm” action.
- Once the order is confirmed, the Acumatica system will place the order in an “Open” state, and it can then move forward for processing.
Building a New Workflow
This video from Acumatica’s VP of Solution Architecture, Doug Johnson, provides a demo of the workflow building process, giving a visual representation of the following steps:
- Copy the Sales Order Type and change the Description to Online Order.
- Navigate to the Sales Order screen in the Customization Project.
- In the left-hand dropdown menu, under the screen name, click on Workflows.
- At the top of the next screen, click Add Workflow.
- In the Add Workflow box, set the Operation to Extend System Workflow, the Base Workflow to SO Workflow, the Workflow Type to SO, and the Workflow Subtype to OO. Also define the Workflow Name—in this case, Sales Order: OO.
- Click OK.

- Click on the Sales Order: OO workflow name in the list of workflows.
- Inside the Workflow, click Add State.
- In the Add State box, set the identifier to A and the Description to Awaiting Confirmation.
- Click OK.
- In the States and Transitions Panel, twirl down the list of Transitions under _(Inherited).
- Click Initialize State > Open.
- Change the Target State to Awaiting Confirmation.
- Open the Diagram View tab and click-and-drag a connecting transition from the box representing the new Awaiting Confirmation State to the box representing the Open State. The system will automatically prompt you to create a new action to make this transition happen.
- In the Add Transition box, click Create next to the Trigger Name
- In the New Action box, set the Action Name to Confirm, the Display Name to Confirm, and the Category to Processing. Check the Add to Toolbar box, and then click OK.

- Click OK again to close the Add Transition box.
- Click on the Awaiting Confirmation State.
- In the State box, click on the Actions
- Set the Connotation to Success, so that the Confirm action will be displayed in highly-visible green in the user interface.


- After saving and publishing the Customization Project, the new workflow is active.
5. Business Events
Business Events are configurable scenarios that give users the ability to automatically update business data and create and send notifications based on that data. For example, you can:
- Warn customers of upcoming invoice due dates.
- Notify customers when their orders are ready for delivery or pickup.
- Notify warehouse personnel to be on the lookout for incoming shipments.
- Update sales opportunities that are past their expected close dates.
- And more.
Business Events are essential to automating how you communicate with your customers. They help you build solid relationships by keeping everyone on the same page and sharing information at the right times.
For Company X, all the other configurations they have made so far have worked out very well, and their number of B2C customers has soared. But so has the volume of support cases Company X is fielding. These cases often require additional information from the customers before the support team can proceed, but follow-ups have become a bottleneck in the support process, leading to delayed resolutions and dissatisfied customers.
To maintain higher customer satisfaction and foster loyalty within their growing B2C base, Company X wants to implement an automated system to remind customers about pending feedback on their support cases. They’ll create a new Business Event to accomplish this.
Creating a Business Event
- Inside Acumatica, navigate to the Business Events
- Click on the plus sign (+) at the top of the screen to add a new Business Event.
- Set the Event ID to CasePending5Days, the Type to Trigger by Schedule, the Screen Name to Cases, and the Raise Event field to For Each Record.
- Open the Trigger Conditions tab to define which records the Business Event will apply to.
- Click the plus sign [+] to create a new trigger. We’ll be creating three.
- Number 1: Set the Table Name to CRCase, the Field Name to Status (status), the Condition to Equals, Value 1 to Pending Customer, and and Operator to
- Number 2: Set the Table Name to CRCase, the Field Name to Reason (resolution), the Condition to Equals, Value 1 to More Info Requested, and Operator to
- Number 3: Set the Table Name to Status Changed Date (statusDate), the Condition to Is Between, Value 1 to @Today-5, Value 2 to @Today-6, and Operator to
- Make sure that, for all three triggers, the Active and From Schema checkboxes are checked. This sets the Business Event to apply (that is, send notifications) to customers for whom all three conditions are true. So, a notification will be sent to a customer if they are listed as “pending” in Acumatica; you need more information from them; and their case has been waiting for exactly 5 days.

- Click Create Schedule under the Schedules
- In the Automation Schedules box, set the Schedule ID to Daily Case Check, the Action Name to Raise Business Event, and the Description to Daily Case Check. Make sure that the Active box is checked.
- In the Schedule tab, set the Frequency to Daily and choose the Next Execution Date and Next Execution Time you want. Save the schedule. The created schedule is automatically added to the Schedules tab, and the Event will run based on it. (In this example case, it will run once every day.)

- Back on the Business Event creation screen, navigate to the Subscribers tab and click Create Subscriber. In the dropdown menu, choose Email Notification. (Your other options are Import Scenario, Task, Action Execution, Mobile Push Notification, Mobile SMS Notification, and Teams Notification.)
- Open the new Email Notification subscriber, which will bring up the Email Template Here, you will select your recipient mailing list and enter your message copy. You can also insert Data Fields which will automatically populate the email with necessary information. For instance, “((Contact_displayName))” will prompt Acumatica to automatically input each recipient’s name when the email notifications are sent. These fields are from the Cases GI.

- Save your work, and the new Business Event is ready to go.
Scalability and Stability—Your Way
As we’ve seen in the hypothetical story of Company X, and in the real-life story of Raubex, Acumatica’s no-code customization tools make the system flex to meet unique business needs. They also require no changes between upgrades to your Acumatica system, ensuring the long-term scalability and stability of your personalized, streamlined solution. It’s just one of the many ways Acumatica grows and evolves with you.
If you have any thoughts, questions, or suggestions about no-code customizations and how to best put them to work for your business, check out (and join if you haven’t already) the Acumatica Community. If you’re new to Acumatica and would like to learn more about the system from the ground up, explore the free courses available through Acumatica Open University. And if you have any other questions related to Acumatica and how it can be tailored to custom-fit your business, contact our team of experts today.
