The Acumatica Report Designer is a powerful tool for creating custom reports in the Acumatica ERP system. With the Report Designer, users can create reports that contain data from multiple sources, such as sales orders, invoices, and customer information. The reports can be formatted and customized to meet the specific needs of the user and can be easily exported to a variety of file formats, including PDF, Excel, and Word.
Use Templates to Save time
If you find yourself creating similar reports on a regular basis, you can save time by using templates. Templates are pre-designed reports that you can use as a starting point for your own custom reports. To create a template, simply create a report as you normally would, and then click on the “File” menu and select “Save As Template”. You can then use this template as a starting point for future reports by clicking on the “File” menu and selecting “New From Template”.
Grouping & Sorting Options in the Report Designer
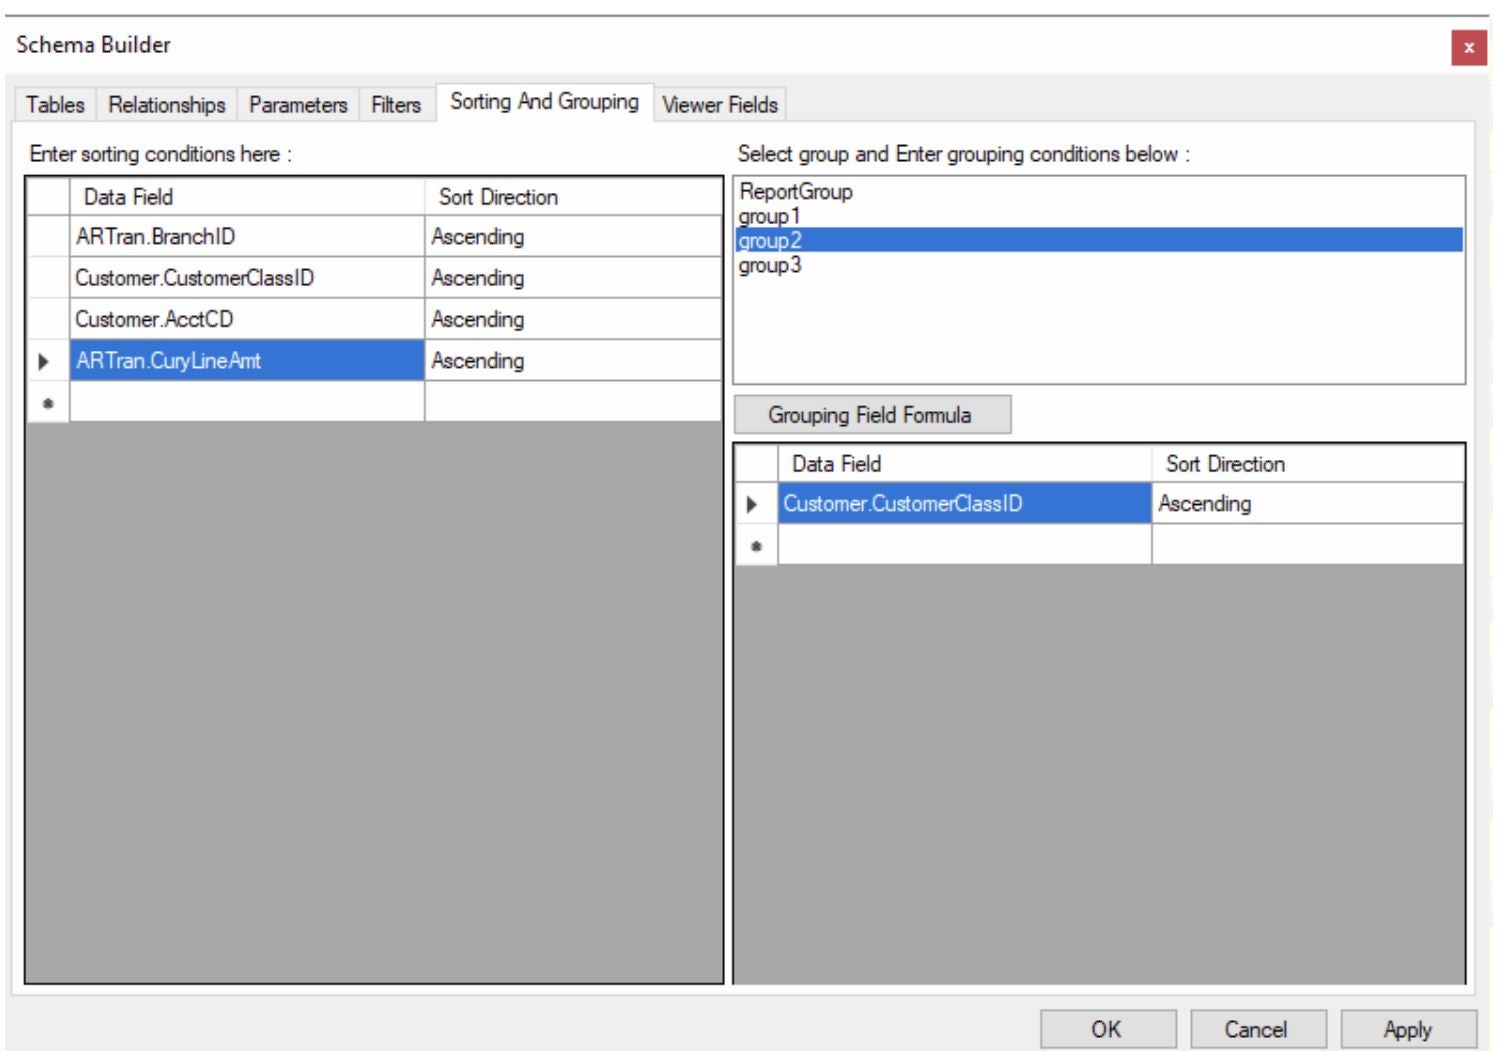
Take advantage of the Report Designer’s grouping and sorting options. The Report Designer allows users to group and sort data in the report, which can make it easier to analyze and understand the data. For example, users can group sales data by customer class, and then sort the data by sales amount, to create a report that shows the top-selling customers by class.

Take Advantage of Formatting Options
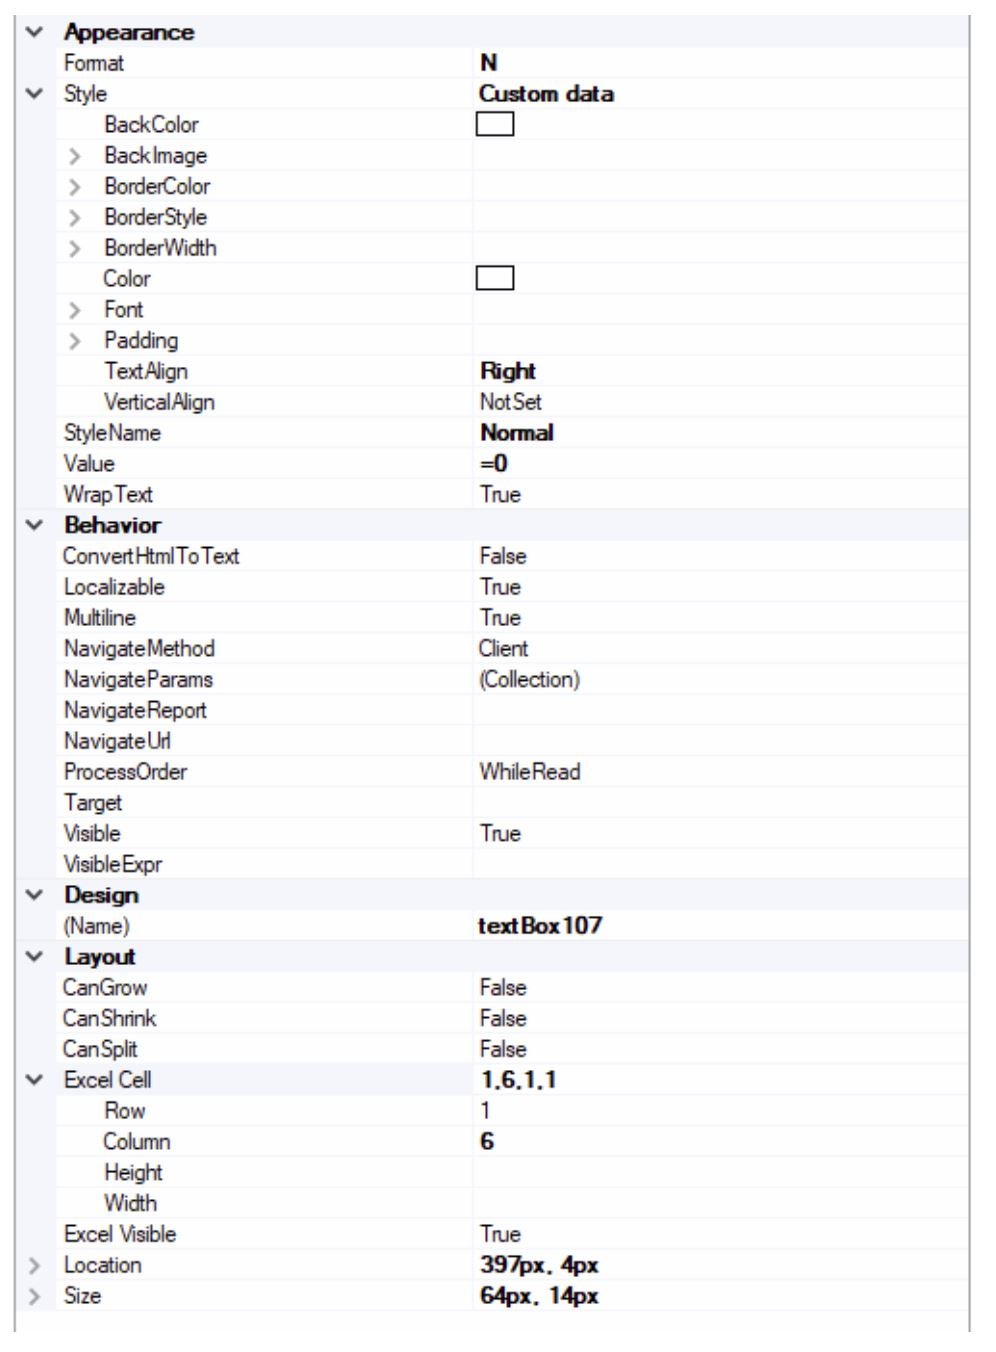
The Acumatica Report Designer includes a wide range of formatting options that can help you make your reports more visually appealing and easier to read. For example, you can use the “Appearance” section on the sidebar to adjust font sizes and styles, add borders and shading to cells, and apply color schemes to your reports. You can also use the “Layout” section of the sidebar to adjust the overall layout and organization of your report.

In this section you can also specify the specific Excel cell, which will be used when the report is exported to Excel, it is important to note that this is only used when the report “Excel Mode” property is set to “Manual”. In order to verify that the layout is correct when exporting to Excel you can show the “Excel Grid” by going to the “View” menu and under the “Excel Grid” sub-menu show both the rows and columns. This will show the row:column on the top right side of the field detailing on which row and column it will be once exported.

Use the “Preview” Feature to See How your Report will Look
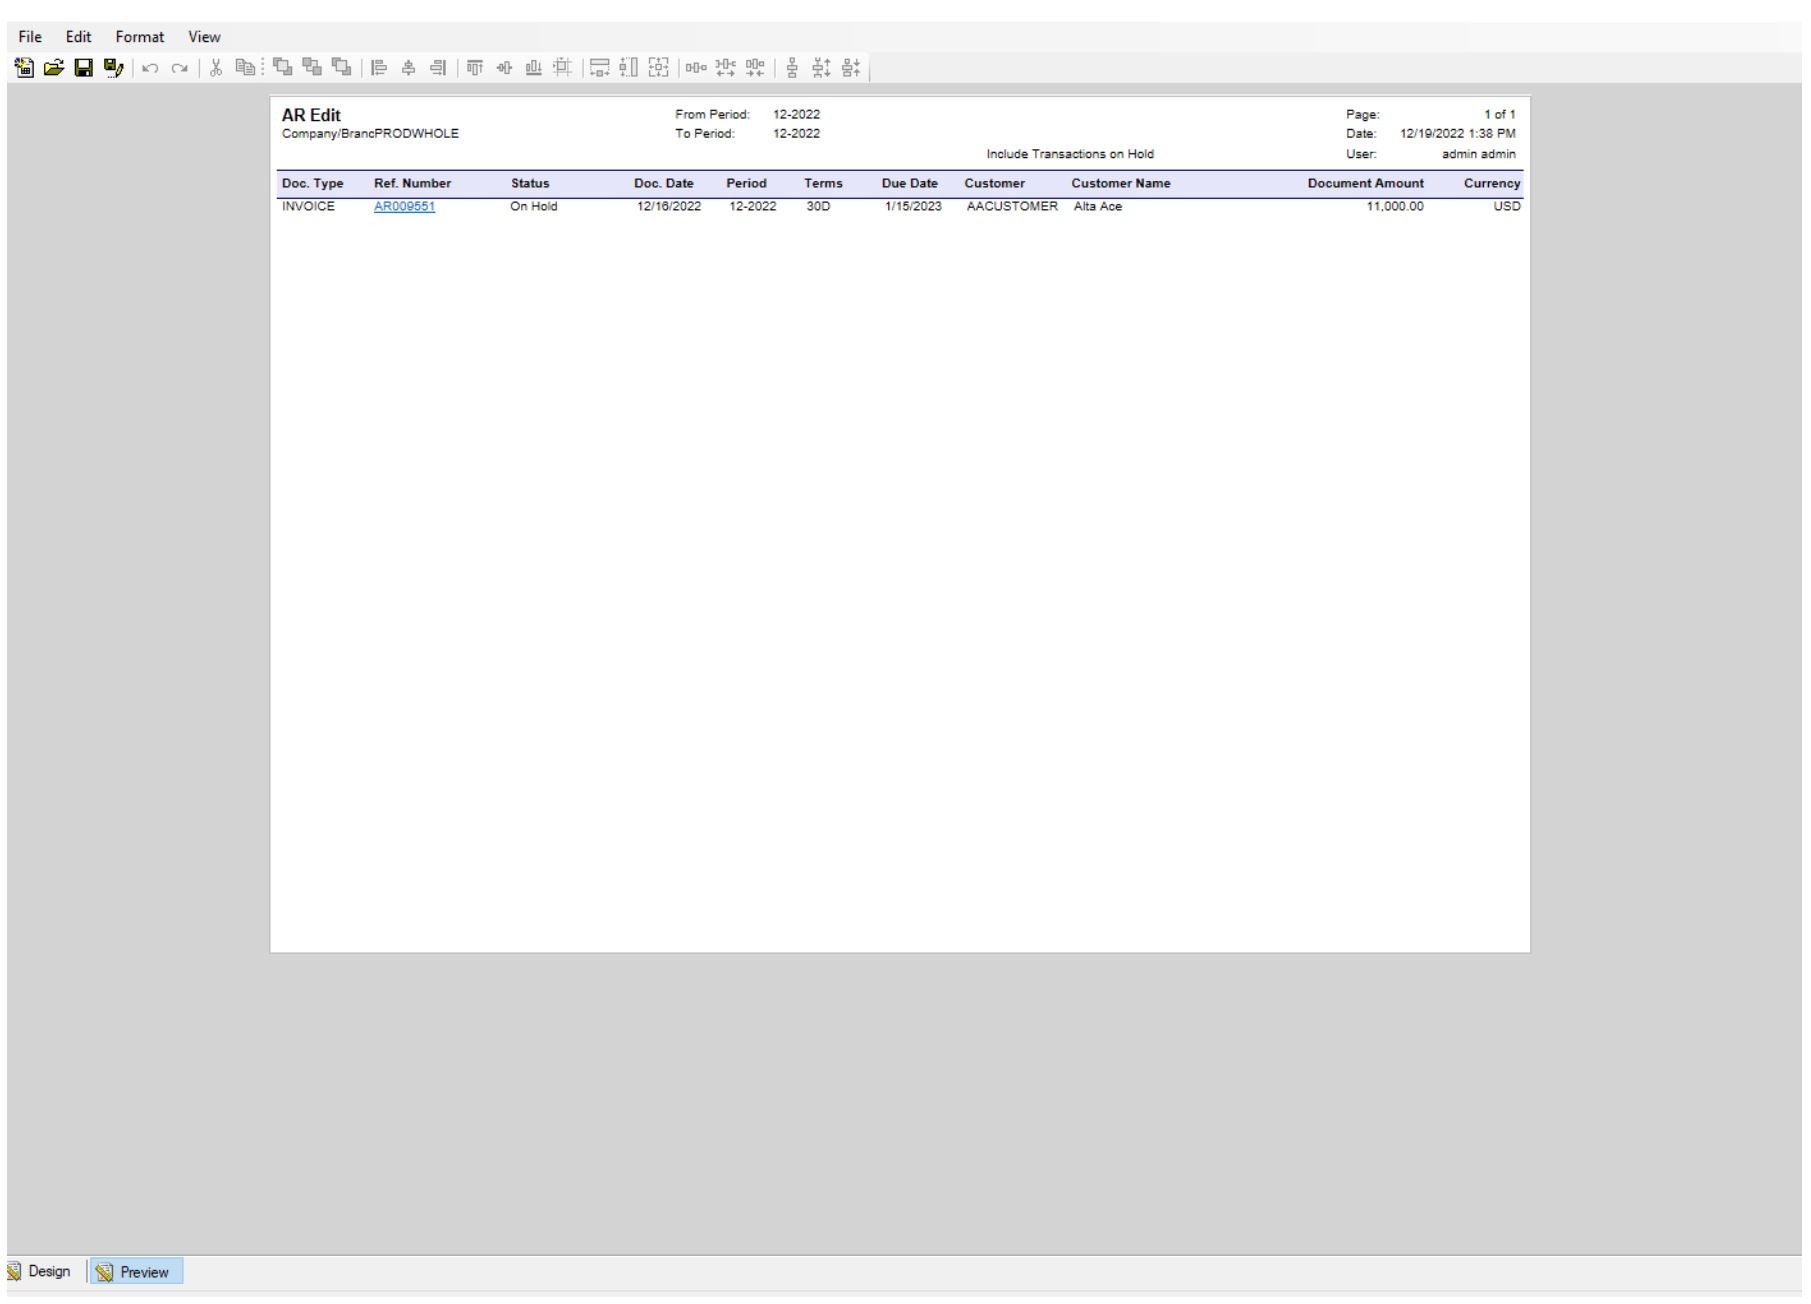
Before you finalize your report, it’s a good idea to use the “Preview” feature to see how it will look when printed or exported. To access the Preview feature, click on the “View” menu and select “Preview”. This will open a separate tab that displays a preview of your report, complete with all of the formatting and layout options you’ve applied. You can use this preview to make any final adjustments or changes before saving or printing your report.

Using Built-in Calculation Functions in the Acumatica Report Designer
Use the Report Designer’s built-in calculation functions to perform calculations on the data in the report. The Report Designer includes a variety of calculation functions, such as SUM, AVG, and MAX, which can be used to perform calculations on the data in the report. This is a useful way to quickly analyze and understand the data in the report.
That’s it for Part One of our series on the Report Designer. In Part Two, we’ll continue our exploration of this topic by looking at calculation functions. We’ll also delve into advanced tricks such as summations using conditional clauses instead of variables.
Don’t miss it!
Happy Reporting!
 Canada (English)
 Columbia
 Caribbean and Puerto Rico
 Ecuador
 India
India
 Indonesia
 Ireland
 Malasya
 Mexico
 Panama
 Peru
Peru
 Philippines
 Singapore
 South Africa
 Sri-Lanka
 Thailand
 United Kingdom
 United States


