Reviewed: Jan, 2023
Recently, I have often heard from other developers that it is very difficult or not even possible to use ASP.NET Web API and MVC directly with Acumatica. However, it is not as difficult as we are led to believe. In fact, I will share with you in my post how you can use these technologies and integrate them in your code with the Acumatica development platform.
ASP.NET Web API
Acumatica is using Autofac for Dependency Injection which makes it possible to register controllers from various libraries. This can be accomplished relatively simply in the following manner:
GIST: https://gist.github.com/sampetrosov/566e676cafc9eaa3a05f050b137bc8b6
`config.MapHttpAttributeRoutes();` allows to use `RouteAttributes` on our Controller and ` builder.RegisterApiControllers(Assembly.GetExecutingAssembly());` registers all classes inherited from ApiController.
First, let us review how we can define a simple Web API REST Endpoint which will accept some data and create corresponding records in Acumatica ERP (Enterprise Resource Planning). We need to have an authorization mechanism to get the Username and Password in order to sign into Acumatica. I will use a simple authorization method such as illustrated in the code below:
GIST: https://gist.github.com/sampetrosov/0384f2a9500e1f59c5c6cd5fd1b115ec
It assumes that the company, username, and password will be passed as a string “company:username:password” encoded with base64. And as you can see from code, that Company is optional and required only if you have multiple tenants in Acumatica. I will use a simple model for accessing Business Accounts in Acumatica and adding records to them as follows:
GIST: https://gist.github.com/sampetrosov/f7df2fe0e8cc9923a96713a1f0ef53dd
As you can see, some parts of the program are simplified or skipped. For example, the validation of the incoming data for the Business Account. Now that we have a model, we can define the ApiController, which can be done in a very simple way in the following manner:
GIST: https://gist.github.com/sampetrosov/d29fd9c18078db3ffedcf944bb07b636
As you may have already noticed, it’s just a regular Web API controller and this is basically all that we need to accept requests.
MVC Controllers & Razer Views
Now let’s see how we can achieve something like MVC Controllers and Razor Views. In simple terms, the basic difference between an API Controller and a MVC Controller is that an API controller requires that all the results that are being sent back as a response need to be serialized.
So in this case, we can use an API Controller and just do the proper compilation and the serialization of the html/cshtml before sending it back. I will use the RazorEngine (Antaris/RazorEngine: Open source templating engine based on Microsoft’s Razor parsing engine (github.com) ) library for compiling the .cshtml files and using razor syntax.
I will add my views under the “Frames/IIG/” folder and load them from the code as text. In the case of a MVC endpoint, we assume that the user needs to open the page in the browser and provide a token which may be generated by some entry in Acumatica and send by email.
We will show the corresponding data after passing the authorization information. Below, you can see we added some actions to our API Controller for doing our authorization in our code:
GIST: https://gist.github.com/sampetrosov/ea3739474ee44477f489fbcb29a80547
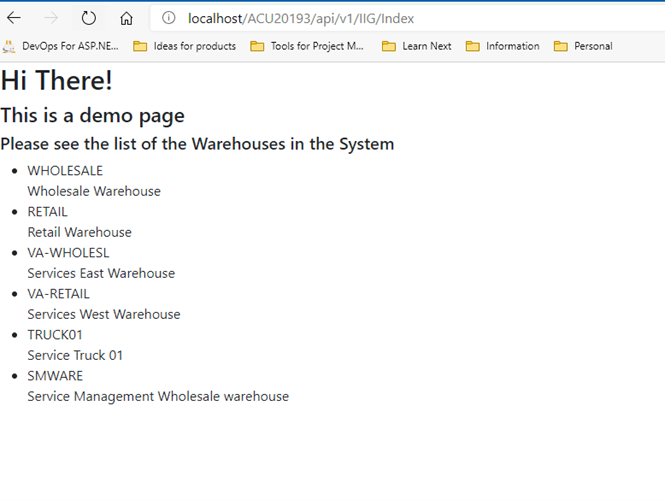
The result is that the Get Action will show the page with the Authorization form as shown in the screenshot below:

And the POST Action will try to do the authorization and render back the result something like this:

In my particular case, I am just using “company:username:password” encoded into base64 as the token. However, for real-world scenarios, you should probably also add branch, timestamps and some other record identifiers to filter and show only the records that this token is assigned to.
So you see, it’s really not hard at all to use ASP.NET Web API and MVC directly with Acumatica after all.
On GitHub, I have provided the complete source code and installation package link that you can use in your own code:
https://github.com/sampetrosov/Acumatica-CustomController.git
Hopefully, you have found this information useful in your own development work and it helps make your efforts a bit easier with respect to using ASP.NET Web API and MVC.
Happy Coding!
 Canada (English)
 Colombia
 Caribbean and Puerto Rico
 Ecuador
 India
India
 Indonesia
 Ireland
 Malaysia
 Mexico
 Panama
 Peru
Peru
 Philippines
 Singapore
 South Africa
 Sri Lanka
 Thailand
 United Kingdom
 United States


